6x6 Project Blog
Getting technical.
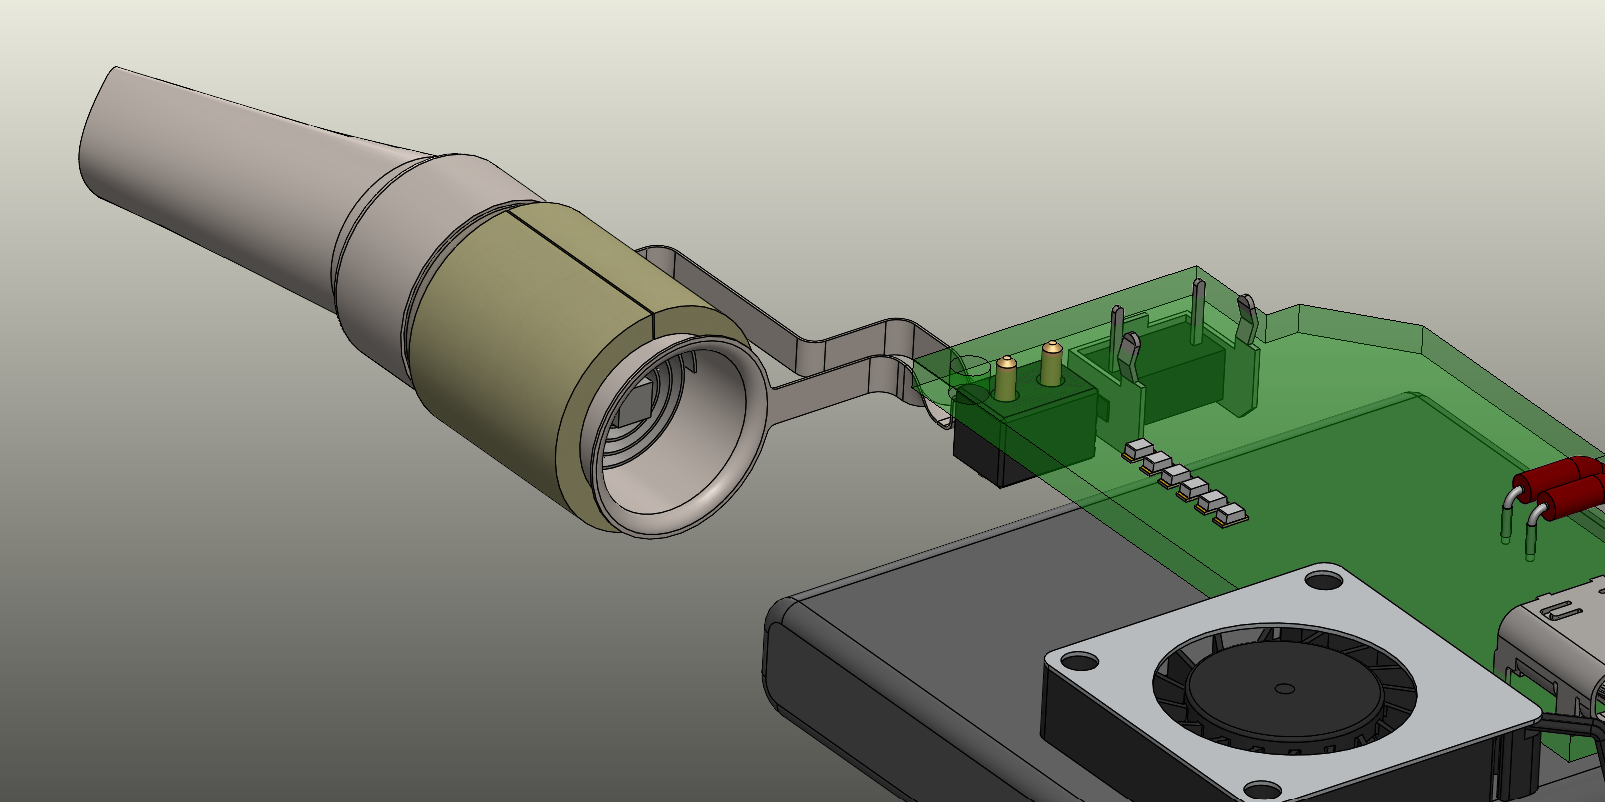
2023-07-18Two days ago, I refined the heater, made it a slightly smaller diameter. Added in a retaining wall to help with heat and protection. Refined the wiring to the heater as well. Wanted to keep it with no solder connections near the airpath so both the two ends connect directly to the circuit board itself. Although, I still had to make sure the circuit board connector was beefy and could handle the large power output.


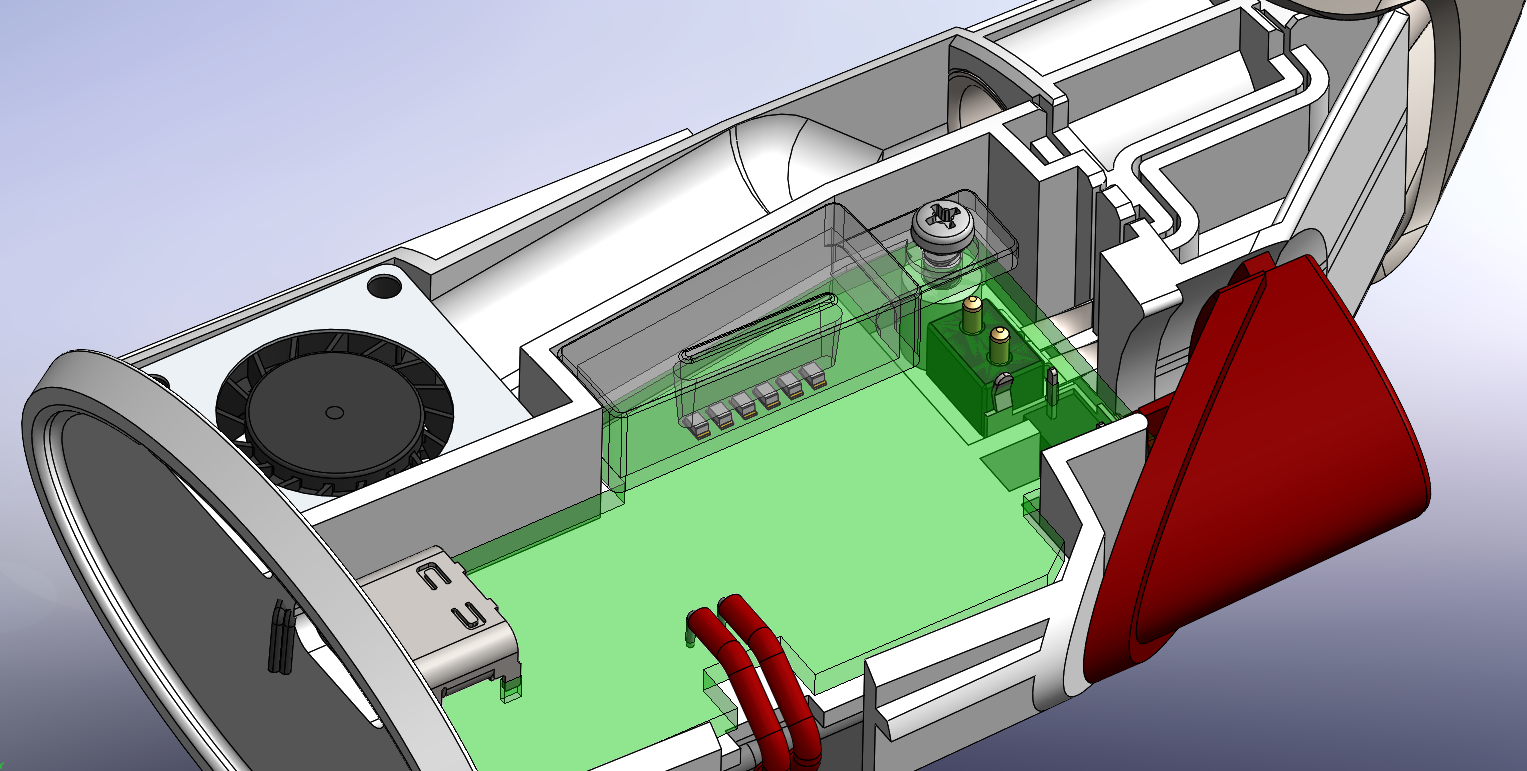
A lot of time was put into carving out the plastic, mainly at the top area but also around the sides, to make it plastic injection mold ready.
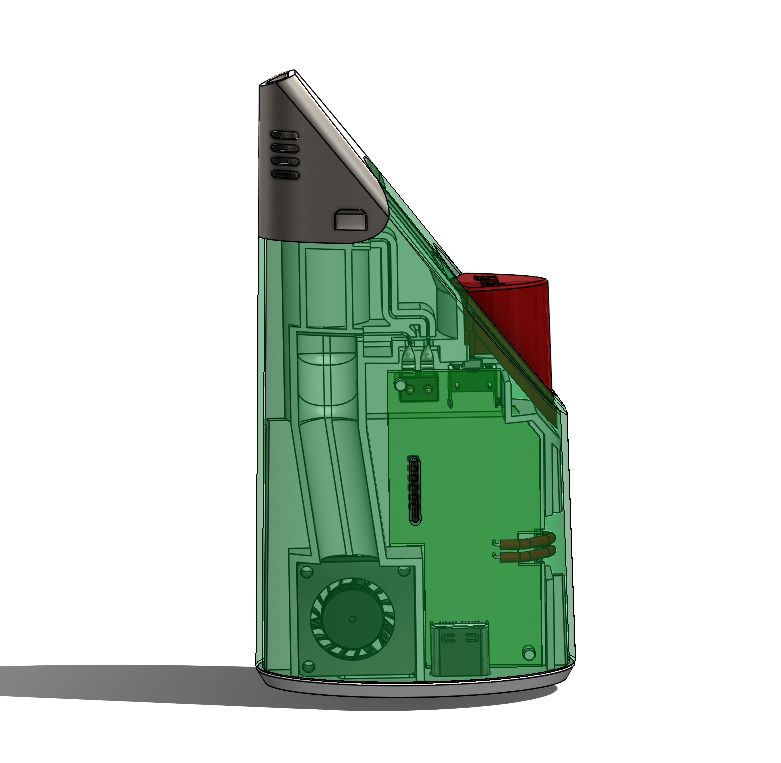
I also took another pass on the airpath. Made it more aerodynamic and easier to mold in plastics. Still needed a secondary piece to restrict the internal size of it which I made the next day.

Yesterday and today were very successful. I first focused on the heater. I already had the working heater design from a previous development. It’s a combination design that combines the high-power heater of expensive vapes but uses lower cost manufacturing processes. It requires a large amount of power output, around 50W. One notable feature I designed in was that it requires no solder or toxic materials anywhere near the heating/airpath. In this design it uses the plastic chassis itself as the guard to keep the “wiring” protected. Since I made the heater slightly smaller in diameter it may have changed its power rating slightly.

Once I had the heater fit inside and wire paths complete, I then reworked the airpath. Previously it went straight up then took a side step near the heater. I made a gradual angle on the top face and then went straight up to the fan. My belief there is that it should reduce air turbulence and be easier for injection molding and manufacturing. In the end I found it looked better and was easier to work with as well.


Rappaport Designs
We are a small product development team who enjoy problem solving and connecting with creators. From Detroit, Michigan, USA.
We are a small product development team who enjoy problem solving and connecting with creators. From Detroit, Michigan, USA.
Services
Product Development
Concept Design
Prototyping
Computer Aided Design (CAD)
Design for Manufacture (DFM)
Manufacture Drawings
Design Feasibility Consulting
Reverse Engineering
Patent Law and Drawings
End-to-End Development
Product Development
Concept Design
Prototyping
Computer Aided Design (CAD)
Design for Manufacture (DFM)
Manufacture Drawings
Design Feasibility Consulting
Reverse Engineering
Patent Law and Drawings
End-to-End Development
Fields of Work
Heavy Industry
Construction
Smart devices
Internet of Things (IOT)
Healthcare
Medical
Wearable
Remote
Start-up
Crypto
Exercise Equipment
Durable Design
Amazon
Kickstarter
Computer Accessories
Hobby Culture
Heavy Industry
Construction
Smart devices
Internet of Things (IOT)
Healthcare
Medical
Wearable
Remote
Start-up
Crypto
Exercise Equipment
Durable Design
Amazon
Kickstarter
Computer Accessories
Hobby Culture
